Test
Test
Test
You can make use of a user guide to help a user get a complete understanding of a feature or a product. For example, this is how a user guide might look for using article template
TABLE OF CONTENTS
Test
Standardize your knowledge base by creating templates such as a simple FAQ-style article, step-by-step guides, How-To, Release notes, and a lot more. Your team can simply choose from the predefined templates and start creating their articles from there - saving them time.
Introduction to templates
Standardize your knowledge base by creating templates such as a simple FAQ-style article, step-by-step guides, How-To, Release notes, and a lot more. Your team can simply choose from the predefined templates and start creating their articles from there - saving them time.
Creating templates
- Go to Knowledge Base
- Click on the hamburger menu on the top left
- Select Article templates
- Click on New template and start creating your template
Mark a template as default to load it automatically while creating a new article.
Using templates
- Once you save a template, click on Use template to open the template as a new article
- Make the relevant changes to the template and save the article
Lorem ipsum dolor sit amet, consectetur adipiscing elit, sed do eiusmod tempor incididunt ut labore et dolore magna aliqua. Ut enim ad minim veniam, quis nostrud exercitation ullamco laboris nisi ut aliquip ex ea commodo consequat. Duis aute irure dolor in reprehenderit in voluptate velit esse cillum dolore eu fugiat nulla pariatur. Excepteur sint occaecat cupidatat non proident, sunt in culpa qui officia deserunt mollit anim id est laborum.
Lorem ipsum dolor sit amet, consectetur adipiscing elit, sed do eiusmod tempor incididunt ut labore et dolore magna aliqua. Ut enim ad minim veniam, quis nostrud exercitation ullamco laboris nisi ut aliquip ex ea commodo consequat. Duis aute irure dolor in reprehenderit in voluptate velit esse cillum dolore eu fugiat nulla pariatur. Excepteur sint occaecat cupidatat non proident, sunt in culpa qui officia deserunt mollit anim id est laborum.
Lorem ipsum dolor sit amet, consectetur adipiscing elit, sed do eiusmod tempor incididunt ut labore et dolore magna aliqua. Ut enim ad minim veniam, quis nostrud exercitation ullamco laboris nisi ut aliquip ex ea commodo consequat. Duis aute irure dolor in reprehenderit in voluptate velit esse cillum dolore eu fugiat nulla pariatur. Excepteur sint occaecat cupidatat non proident, sunt in culpa qui officia deserunt mollit anim id est laborum.
2. Select Intake Forms.
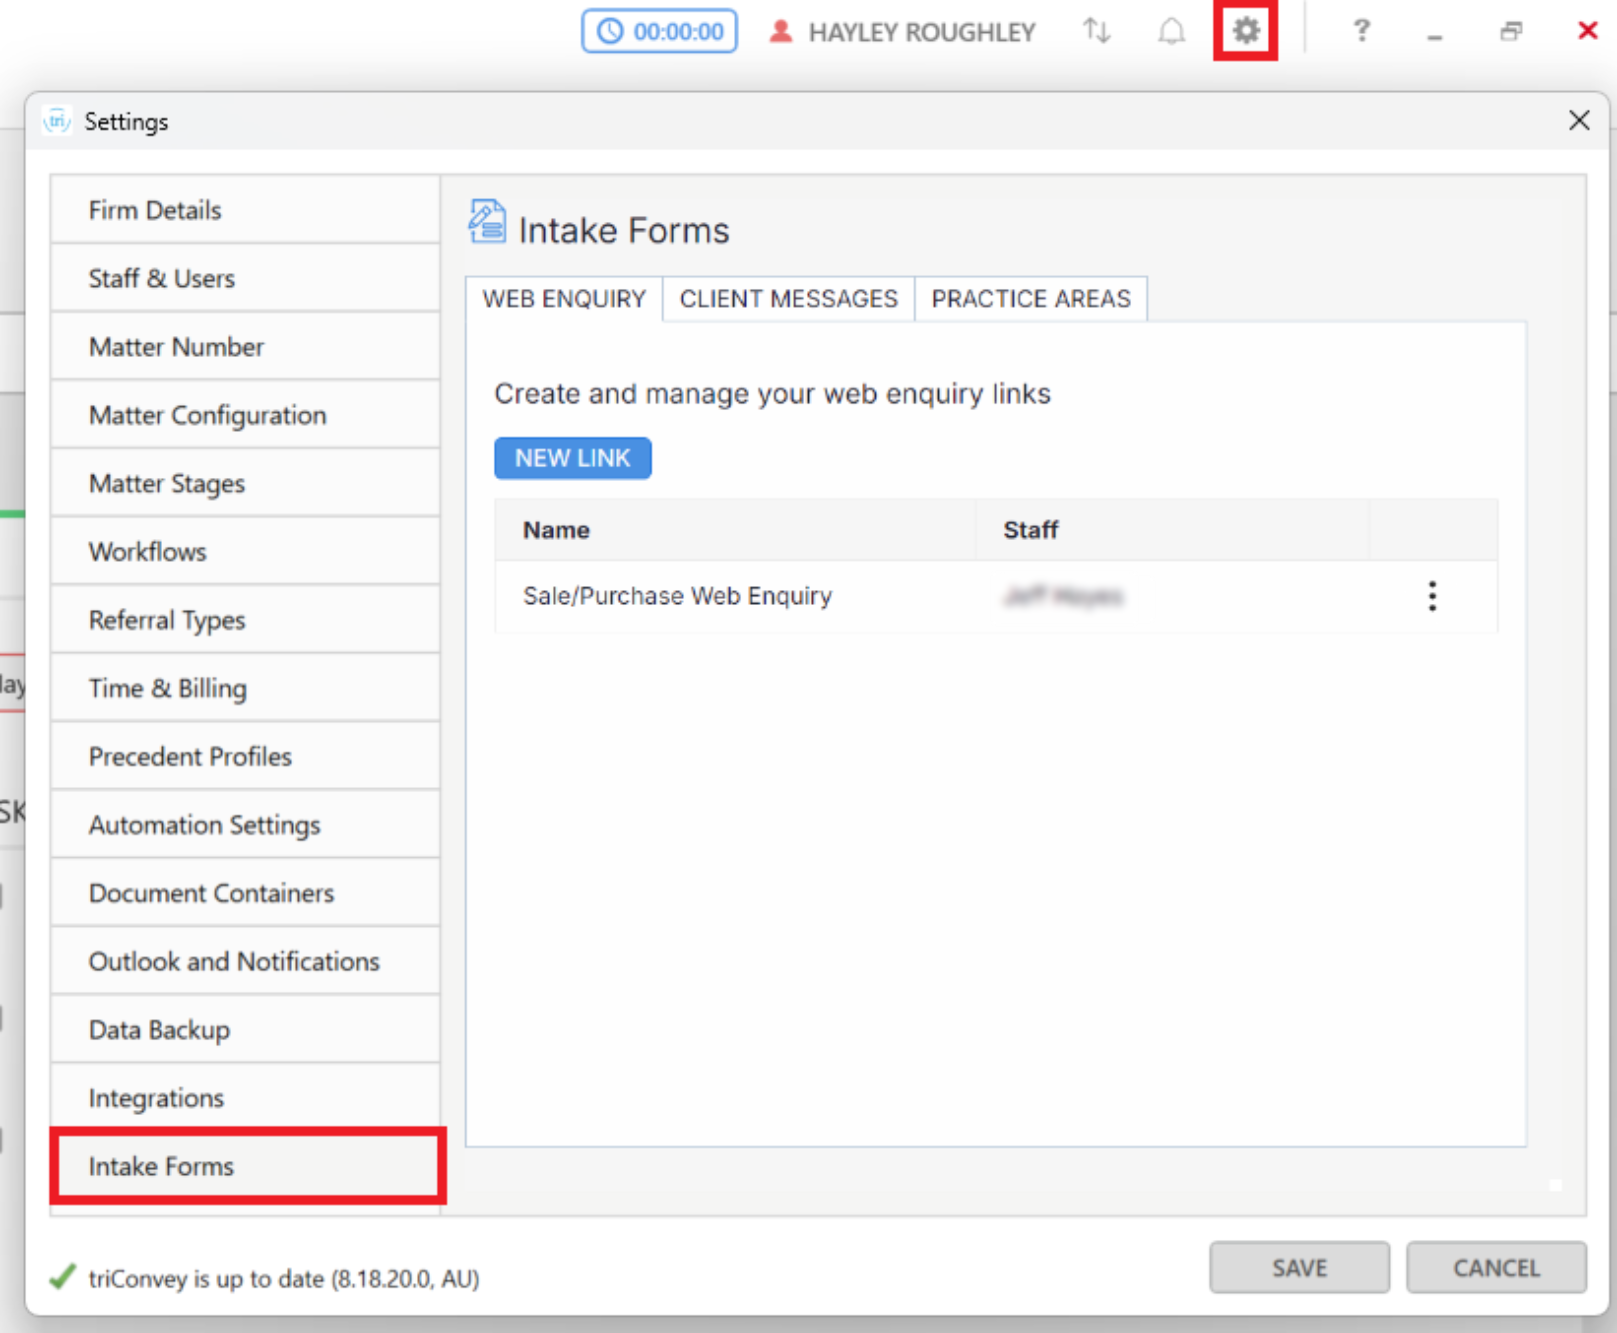
3. Select the Practice Areas tab and confirm that your state and practice areas of law are displayed. Click on Edit to make changes.

4. Under the Web Enquiry tab, select New Link.

5. The New Link window will open. Choose the form you wish to share from the Form drop-down menu.
Tip: Your firm's custom lead forms will appear first, followed by forms created by us (listed under triConvey Forms).
6. Under the Staff drop-down menu, select or type in the names of staff members who will receive a notification when someone has submitted a form.

7. (Optional) If you have a Google Analytics measurement ID/tag ID, enter it in the Google Analytics measurement ID field to track the form.

8. You can choose to get a link to the form, generate a code for an embedded form or add a 'Contact Us' button on your website.
Embedded  | Your website designer can change how this button looks |
9. Select Copy Code next to the option you prefer.

10. Paste the code into a Notepad file and send this to your website designer.
Tip: Adding the intake form code to your website is outside the scope of triConvey Support. Please reach out to whoever manages your website's theme to implement this on your website.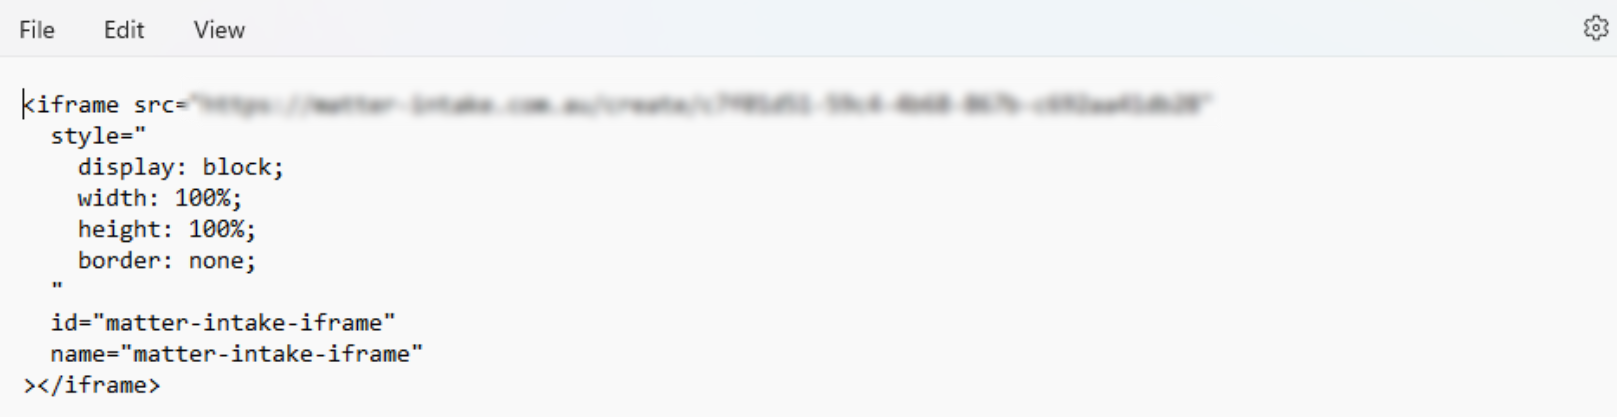
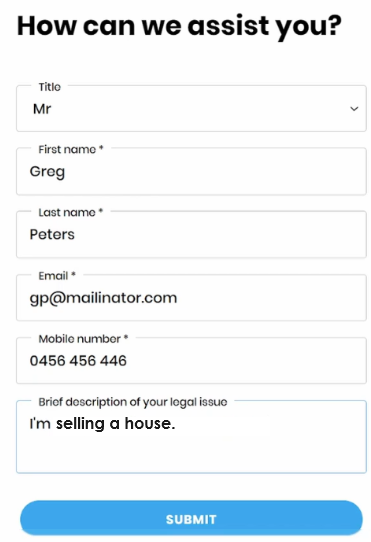
Once this is on your website, prospective leads simply need to fill out the form, and you will receive these responses in triConvey.
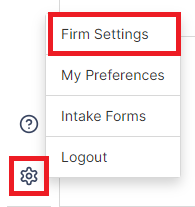
2. Select Intake Forms.
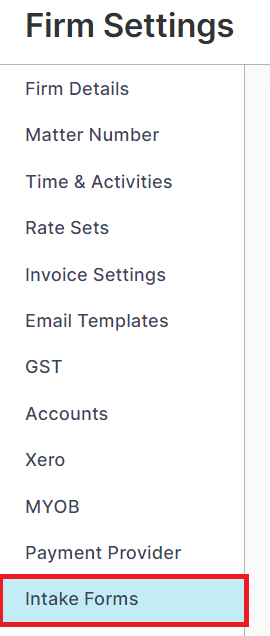
3. Select the Practice Areas tab and confirm that your state and practice areas of law are displayed. Click on Edit to make changes.

4. Under the Web Enquiry tab, select New Link.

5. The New Link window will open. Choose the form you wish to share from the Form drop-down menu.
Tip: Your firm's custom lead forms will appear first, followed by forms created by us (listed under triConvey Forms).
6. Under the Staff drop-down menu, select or type in the names of staff members who will receive a notification when someone has submitted a form.

7. (Optional) If you have a Google Analytics measurement ID/tag ID, enter it in the Google Analytics measurement ID field to track the form.

8. You can choose to get a link to the form, generate a code for an embedded form or add a 'Contact Us' button on your website.
Embedded | Your website designer can change how this button looks  |
9. Select Copy Code next to the option you prefer.

10. Paste the code into a Notepad file and send this to your website designer.
Tip: Adding the intake form code to your website is outside the scope of triConvey Support. Please reach out to whoever manages your website's theme to implement this on your website.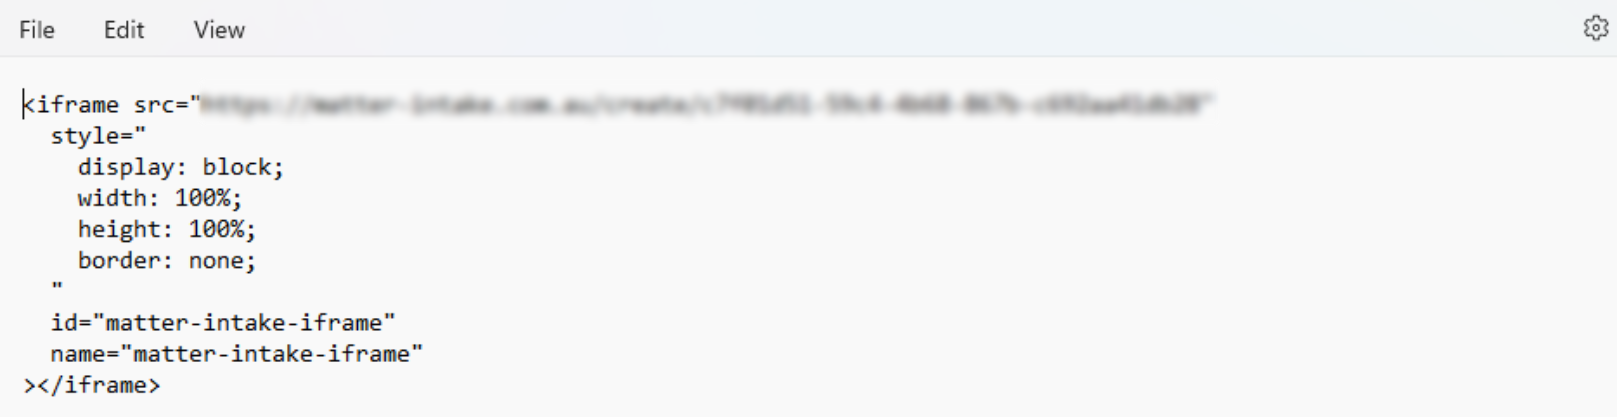
Once this is on your website, prospective leads simply need to fill out the form, and you will receive these responses in triConvey.
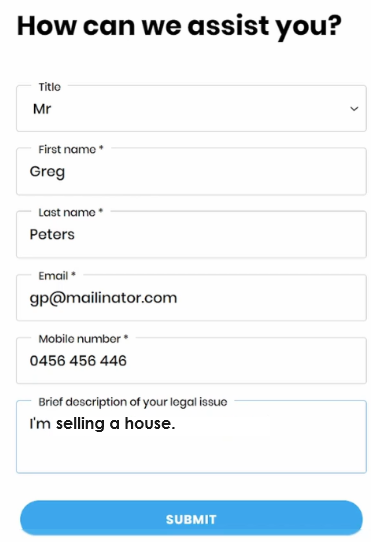
Copy a link or QR code to your Lead Intake Form
If you wish to include a link to your form in your email signature or social media post, select the three dots icon and click on Copy "Link" to copy the URL of the form to your clipboard.
You can also copy the QR code of the form by selecting Show QR Code and clicking on Copy.
 |  |
Create a custom Lead Intake Form
You can easily create a lead intake form with the fields of your choice. Refer to the Create a custom Intake Form article for more information on how to set this up.
View submitted forms
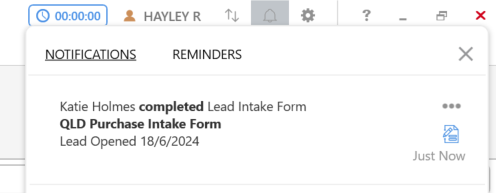
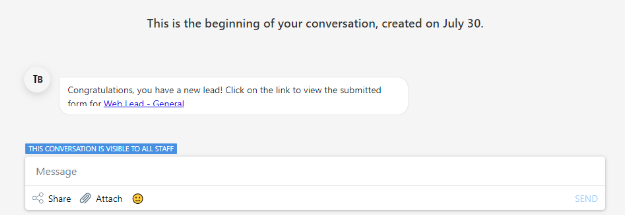
To add or remove staff members who get these notifications:
1. Select the gear icon from the top-right corner of the triConvey Desktop App.
2. Select Intake Forms.
3. Select the three vertical dots icon next to the form name and click Change Settings.
4. Under the Staff drop-down menu, select or deselect staff members.

5. Select Update.
When you click on the Lead file in triConvey, the lead contact card is automatically created and populated with the lead's contact information. A copy of the lead intake form can be found in the Intake folder within the matter files.

To add or remove staff members who get these messages:
1. Open Firm Settings and then select Intake Forms.
2. Select the three vertical dots icon next to the form name and click Change Settings.
3. Under the Staff drop-down menu, select or deselect staff members.

4. Select Update.
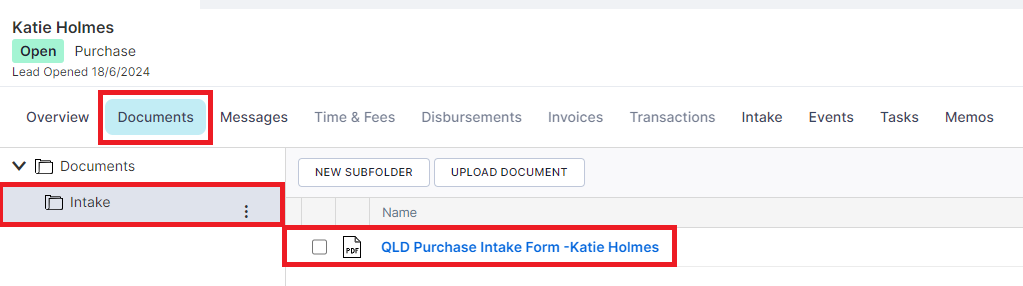
When you click on the Lead file, the lead contact card is automatically created and populated with the lead's contact information. A copy of the lead intake form can be found in the Intake folder within the matter files.
Send a follow-up form
You can request more information from the lead before you decide to take them on as a client.
Tip: Not all matter types contain follow-up forms.1. To send a follow-up to the web enquiry open the lead file and select the Intake tab from either:
- the triConvey Desktop App; or

- the triConvey Companion Site Web App.

2. Select Share Form.
Tip: The Lead's contact details are automatically populated.
3. Select the type of form you wish to send from the Forms drop-down menu (if applicable).
4. Select the Client Portal toggle if you wish to send the form via Messages or the Email toggle if you wish to send the form as an email.
5. Select the Custom Field icon to insert specific fields from your matter into the message.
Tip: This message can be customised for all matters in Firm Settings > Intake > Client Messages.
6. Once you are ready to send this form to the lead, select Share to share as a Client Portal message or Open Email if sending the form via email.
Lorem ipsum dolor sit amet, consectetur adipiscing elit, sed do eiusmod tempor incididunt ut labore et dolore magna aliqua. Ut enim ad minim veniam, quis nostrud exercitation ullamco laboris nisi ut aliquip ex ea commodo consequat. Duis aute irure dolor in reprehenderit in voluptate velit esse cillum dolore eu fugiat nulla pariatur. Excepteur sint occaecat cupidatat non proident, sunt in culpa qui officia deserunt mollit anim id est laborum.
Lorem ipsum dolor sit amet, consectetur adipiscing elit, sed do eiusmod tempor incididunt ut labore et dolore magna aliqua. Ut enim ad minim veniam, quis nostrud exercitation ullamco laboris nisi ut aliquip ex ea commodo consequat. Duis aute irure dolor in reprehenderit in voluptate velit esse cillum dolore eu fugiat nulla pariatur. Excepteur sint occaecat cupidatat non proident, sunt in culpa qui officia deserunt mollit anim id est laborum.
Lorem ipsum dolor sit amet, consectetur adipiscing elit, sed do eiusmod tempor incididunt ut labore et dolore magna aliqua. Ut enim ad minim veniam, quis nostrud exercitation ullamco laboris nisi ut aliquip ex ea commodo consequat. Duis aute irure dolor in reprehenderit in voluptate velit esse cillum dolore eu fugiat nulla pariatur. Excepteur sint occaecat cupidatat non proident, sunt in culpa qui officia deserunt mollit anim id est laborum.
Lorem ipsum dolor sit amet, consectetur adipiscing elit, sed do eiusmod tempor incididunt ut labore et dolore magna aliqua. Ut enim ad minim veniam, quis nostrud exercitation ullamco laboris nisi ut aliquip ex ea commodo consequat. Duis aute irure dolor in reprehenderit in voluptate velit esse cillum dolore eu fugiat nulla pariatur. Excepteur sint occaecat cupidatat non proident, sunt in culpa qui officia deserunt mollit anim id est laborum.
Lorem ipsum dolor sit amet, consectetur adipiscing elit, sed do eiusmod tempor incididunt ut labore et dolore magna aliqua. Ut enim ad minim veniam, quis nostrud exercitation ullamco laboris nisi ut aliquip ex ea commodo consequat. Duis aute irure dolor in reprehenderit in voluptate velit esse cillum dolore eu fugiat nulla pariatur. Excepteur sint occaecat cupidatat non proident, sunt in culpa qui officia deserunt mollit anim id est laborum.
Lorem ipsum dolor sit amet, consectetur adipiscing elit, sed do eiusmod tempor incididunt ut labore et dolore magna aliqua. Ut enim ad minim veniam, quis nostrud exercitation ullamco laboris nisi ut aliquip ex ea commodo consequat. Duis aute irure dolor in reprehenderit in voluptate velit esse cillum dolore eu fugiat nulla pariatur. Excepteur sint occaecat cupidatat non proident, sunt in culpa qui officia deserunt mollit anim id est laborum.
Lorem ipsum dolor sit amet, consectetur adipiscing elit, sed do eiusmod tempor incididunt ut labore et dolore magna aliqua. Ut enim ad minim veniam, quis nostrud exercitation ullamco laboris nisi ut aliquip ex ea commodo consequat. Duis aute irure dolor in reprehenderit in voluptate velit esse cillum dolore eu fugiat nulla pariatur. Excepteur sint occaecat cupidatat non proident, sunt in culpa qui officia deserunt mollit anim id est laborum.
Lorem ipsum dolor sit amet, consectetur adipiscing elit, sed do eiusmod tempor incididunt ut labore et dolore magna aliqua. Ut enim ad minim veniam, quis nostrud exercitation ullamco laboris nisi ut aliquip ex ea commodo consequat. Duis aute irure dolor in reprehenderit in voluptate velit esse cillum dolore eu fugiat nulla pariatur. Excepteur sint occaecat cupidatat non proident, sunt in culpa qui officia deserunt mollit anim id est laborum.
Lorem ipsum dolor sit amet, consectetur adipiscing elit, sed do eiusmod tempor incididunt ut labore et dolore magna aliqua. Ut enim ad minim veniam, quis nostrud exercitation ullamco laboris nisi ut aliquip ex ea commodo consequat. Duis aute irure dolor in reprehenderit in voluptate velit esse cillum dolore eu fugiat nulla pariatur. Excepteur sint occaecat cupidatat non proident, sunt in culpa qui officia deserunt mollit anim id est laborum.
Was this article helpful?
That’s Great!
Thank you for your feedback
Sorry! We couldn't be helpful
Thank you for your feedback
Feedback sent
We appreciate your effort and will try to fix the article